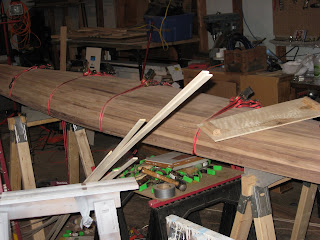
Bow stem piece and hull rough sanded
hull rough sanded and staples gone!
fairing board at rest, re-boung to the forms for the night off!
Saturday, May 31, 2008
Tuesday, May 27, 2008
First view with deck sanded
Sunday, May 18, 2008
Foredeck Done! Center Section Filling Up Quickly
Foredeck almost done
Saturday, May 17, 2008
Friday, May 16, 2008
This week's progress
Here's the aft deck, I think five more srips will complete it except for the central poplar area around the cockpit
Another view from the back, looks like a deck!
From the bow back, poplar filled in and a couple of side strips done.
A better pic of the bow area. Hope to have the entire deck done this weekend, AND get the honey-dos done..... we'll see!
Another view from the back, looks like a deck!
From the bow back, poplar filled in and a couple of side strips done.
A better pic of the bow area. Hope to have the entire deck done this weekend, AND get the honey-dos done..... we'll see!
Sunday, May 11, 2008
My Forms Are Disappearing!!!!
Saturday, May 10, 2008
COUPLE OF TIPS, THOUGHTS
I have found that a combination of duct tape, clamps, plywood "U" shapes, and a hot glue gun work really well for "stapleless" building. (I'm not original, these are all ideas I got from Nick @ Guillemot or other places) Using duct tape to cover the forms seems to work really well too, allowing a pretty solid bond with a fairly easy release of wood glue and hot glue. I did use staples on the hull, but wanted the deck to be as pristine as possible. I have also found that Elmer's carpenter's glue, the waterproof "gel" exterior type (in a photo or two), is thicker and non-runny, sets up and dries quickly, enabling you to move along a bit faster (My wife found it and brought it home.. wasn't sure if I'd like it, but she scored for me!). Another cool feature of the curved deck pattern is that you can work non-stop. Once the sections are laid out, you can place a stip, move to the next section, place another..... By the time you've placed three or four, the first is set up enough to lay the next strip on it. The tapers require some patience though, so if you're challenged in that area, you may want to stick to straight strips!
Enjoy the process... I am.
P.S. My Aunt Q thinks I should change my email to lotsaclamps instead of lotsabikes!
Enjoy the process... I am.
P.S. My Aunt Q thinks I should change my email to lotsaclamps instead of lotsabikes!
Continued progress.......
I ordered and received my fiberglass supplies this week. Ready for the next step... AFTER SANDING THE HULL FAIR......That's gonna take a while!
Continued stripping, some poplar filling in the center section and a bit more walnut around the outside. I'm really pleased with the way the deck is coming together. Won't be long till I'm working on the cockpit.
Again, at this point the going is slow.... Each strip is tapered wildly at each end (a mistake on the second end means a new strip!), but it is also satisfying, every new piece installed seems to close a significant section of the deck.
Sunday, May 4, 2008
A Quick Look @ The Stern Deck After Planing for 30 Seconds
Subscribe to:
Posts (Atom)